Ever needed to find where a specific value is stored in your SQL Server database? This post shows how to search all tables and columns using a dynamic SQL query. It’s a powerful technique for DBAs and developers working with large or unfamiliar databases. Whether you’re debugging, tracking data issues, or reverse-engineering legacy systems, this method will save you time by scanning your entire database for the value you’re looking for.
If someone wants to search by specific value in database, it’s difficult to search a value whole database. Below code easy way to find out
DECLARE @SearchStr nvarchar(100)
SET @SearchStr = 'test@test.com.au'

CREATE TABLE #Output (TableLocation nvarchar(370), Details_Information nvarchar(3630))

SET NOCOUNT ON

DECLARE @SearchTableName nvarchar(256), @ColumnName nvarchar(128), @SearchStr2 nvarchar(110)
SET  @SearchTableName = ''
SET @SearchStr2 = QUOTENAME('%' + @SearchStr + '%','''')

WHILE @SearchTableName IS NOT NULL

BEGIN
    SET @ColumnName = ''
    SET @SearchTableName =
    (
        SELECT MIN(QUOTENAME(TABLE_SCHEMA) + '.' + QUOTENAME(TABLE_NAME))
        FROM     INFORMATION_SCHEMA.TABLES
        WHERE         TABLE_TYPE = 'BASE TABLE'
            AND    QUOTENAME(TABLE_SCHEMA) + '.' + QUOTENAME(TABLE_NAME) > @SearchTableName
            AND    OBJECTPROPERTY(
                    OBJECT_ID(
                        QUOTENAME(TABLE_SCHEMA) + '.' + QUOTENAME(TABLE_NAME)
                         ), 'IsMSShipped'
                           ) = 0
    )

    WHILE (@SearchTableName IS NOT NULL) AND (@ColumnName IS NOT NULL)

    BEGIN
        SET @ColumnName =
        (
            SELECT MIN(QUOTENAME(COLUMN_NAME))
            FROM     INFORMATION_SCHEMA.COLUMNS
            WHERE         TABLE_SCHEMA    = PARSENAME(@SearchTableName, 2)
                AND    TABLE_NAME    = PARSENAME(@SearchTableName, 1)
                AND    DATA_TYPE IN ('char', 'varchar', 'nchar', 'nvarchar', 'int', 'decimal')
                AND    QUOTENAME(COLUMN_NAME) > @ColumnName
        )

        IF @ColumnName IS NOT NULL

        BEGIN
            INSERT INTO #Output
            EXEC
            (
                'SELECT ''' + @SearchTableName + '.' + @ColumnName + ''', LEFT(' + @ColumnName + ', 3630) FROM ' + @SearchTableName + ' (NOLOCK) ' +
                ' WHERE ' + @ColumnName + ' LIKE ' + @SearchStr2
            )
        END
    END
END

SELECT TableLocation, Details_Information FROM #Output

DROP TABLE #Output

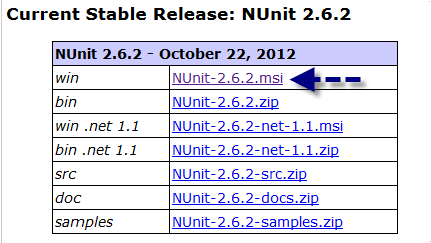

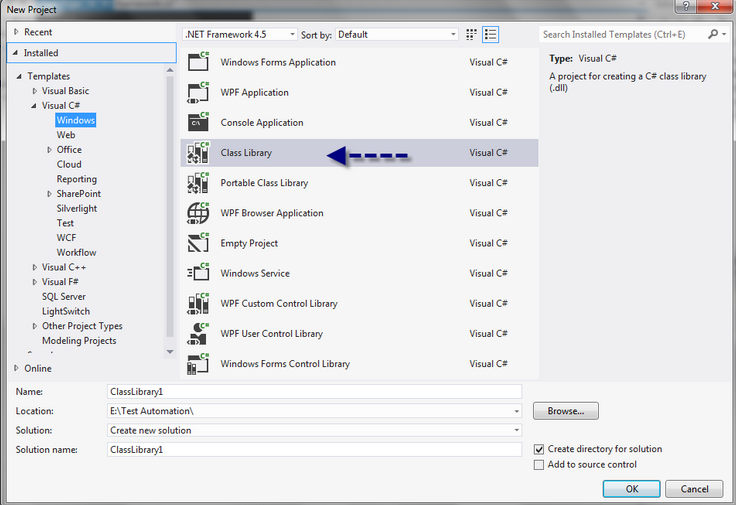
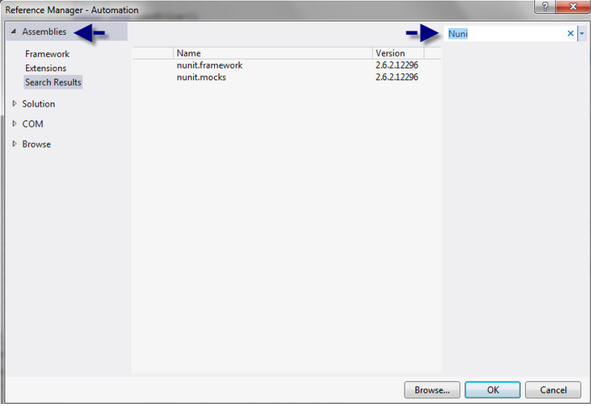
 Nunit Dll
 Or you can add Nunit dll from assemblies > Extension