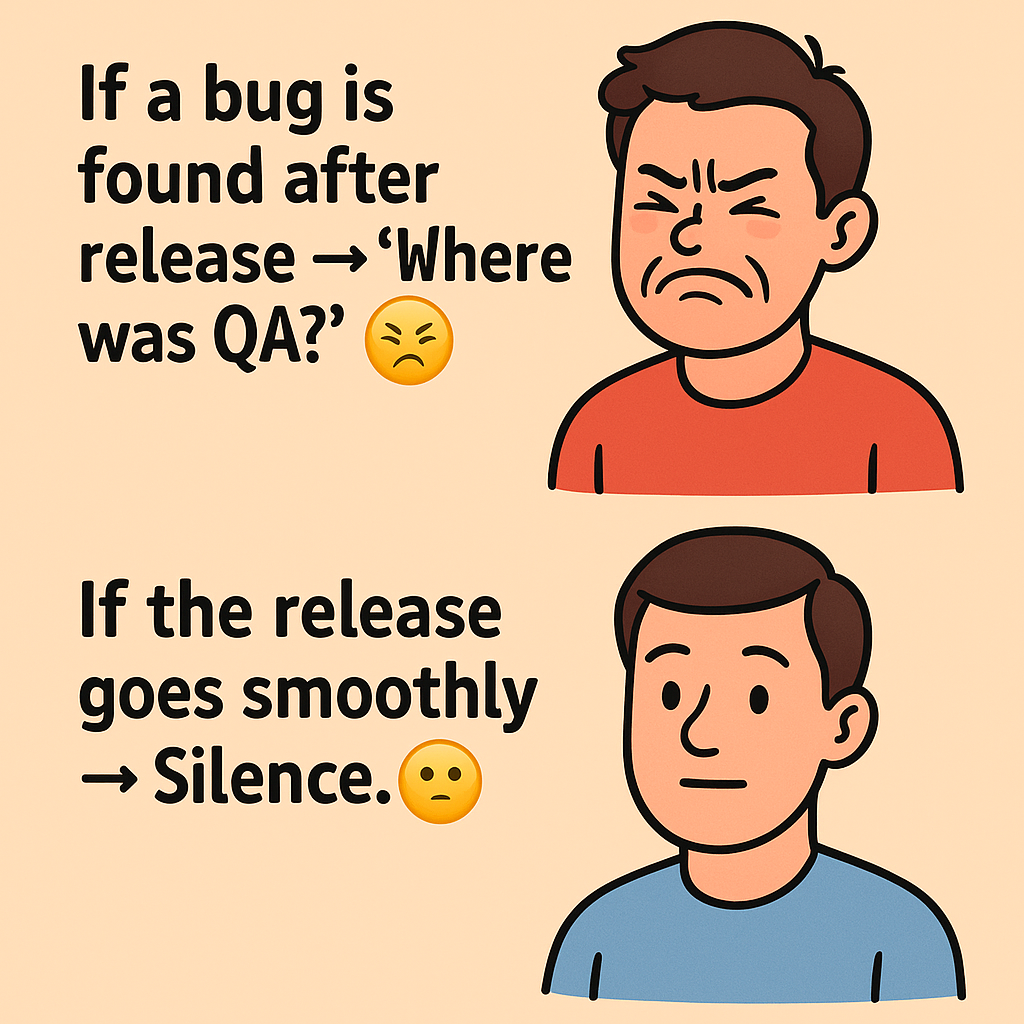
Security Testing for Critical Systems in Software Testing

Introduction:

In today’s increasingly interconnected world, software systems are central to the functioning of businesses, governments, and industries. Many of these systems, such as financial applications, healthcare systems, defense technologies, and critical infrastructure, handle sensitive data or control essential processes. For such systems, security is paramount. A security breach can lead to data loss, financial damage, compromised operations, or even loss of life. Therefore, ensuring the security of critical systems through rigorous testing is an essential component of the software development lifecycle.

What is Security Testing?

Security testing is the process of evaluating a software application or system to identify vulnerabilities, weaknesses, or threats that could lead to unauthorized access, data leakage, or manipulation. It aims to protect the system from malicious attacks, prevent data breaches, and ensure that sensitive information remains secure.

Security testing for critical systems involves assessing how the software behaves in the presence of malicious actors, incorrect usage, or unexpected inputs, and ensuring that the system meets required security standards and compliance regulations.

Key Objectives of Security Testing for Critical Systems:

  1. Identify Vulnerabilities: Detect flaws or weaknesses that could potentially be exploited by attackers. These vulnerabilities may exist in the software, system architecture, or its integration with other systems.
  2. Ensure Data Protection: Critical systems often handle sensitive information. Security testing ensures that data privacy measures are in place and that information is encrypted, masked, or securely stored.
  3. Verify Authentication and Authorization: Strong mechanisms for user authentication and authorization are vital for preventing unauthorized access to critical systems. Security testing ensures that only authorized users can access sensitive parts of the system.
  4. Detect and Mitigate Threats: Identify potential threats, including common attack methods such as SQL injection, cross-site scripting (XSS), and denial-of-service (DoS) attacks. The goal is to ensure that the system is resilient to such threats.
  5. Compliance with Regulations: Many critical systems are subject to industry-specific regulations, such as HIPAA (for healthcare), GDPR (for data privacy), or PCI-DSS (for payment systems). Security testing ensures that the system complies with these standards.

Types of Security Testing for Critical Systems:

  1. Vulnerability Scanning: Automated tools are used to scan the system for known vulnerabilities. These tools compare the system’s components against a database of known security flaws and provide insights into any potential weaknesses.
  2. Penetration Testing (Pen Test): Penetration testing involves simulating real-world cyber-attacks to identify exploitable vulnerabilities. Ethical hackers (or penetration testers) attempt to gain unauthorized access to the system by exploiting weaknesses in its design, implementation, or configuration.
  3. Static Application Security Testing (SAST): SAST involves reviewing the source code of the application without executing it. It identifies vulnerabilities at the code level, such as insecure coding practices, poor input validation, or missing security controls.
  4. Dynamic Application Security Testing (DAST): DAST is performed while the application is running. It focuses on identifying vulnerabilities that occur during the operation of the application, such as improper handling of user inputs or weak session management.
  5. Threat Modeling: Threat modeling helps identify potential security risks early in the software design phase. This involves analyzing how an attacker might exploit weaknesses and how various parts of the system might be targeted.
  6. Security Code Review: A manual or automated review of the application’s code to detect any weaknesses or flaws related to security. This often includes checking for issues such as poor input validation, hardcoded passwords, or insufficient data encryption.
  7. Risk Assessment: Risk assessments identify potential security threats based on system architecture, external threats, and business impact. This includes determining the likelihood of attacks and the impact of those attacks on the organization’s operations.

Best Practices for Security Testing in Critical Systems:

  1. Shift Left Security: Security testing should start early in the development lifecycle, not just during the testing phase. Integrating security into the DevOps process (DevSecOps) ensures that security is embedded throughout the design, development, and deployment stages.
  2. Continuous Security Testing: Security testing shouldn’t be a one-time event but an ongoing process. With the rapid pace of new threats and vulnerabilities emerging daily, continuous testing and monitoring of the system’s security posture is critical.
  3. Use of Automation Tools: While manual penetration testing and code reviews are essential, automated tools can significantly enhance the speed and thoroughness of security testing. Tools like OWASP ZAP, Nessus, and Burp Suite can automate common security tests.
  4. Security Awareness and Training: Developers, testers, and other stakeholders involved in critical systems should be trained to understand common security risks and how to avoid them. This includes recognizing common attack vectors and following best security practices during development.
  5. Patch Management: Vulnerabilities in critical systems often arise from outdated software or libraries. Regular patch management and updates ensure that known vulnerabilities are addressed and patched promptly.
  6. Simulation of Real-World Attacks: Use red teams (simulated adversarial attackers) to conduct security exercises that mimic real-world attacks. These exercises help assess the effectiveness of security controls, the response to incidents, and the ability to mitigate breaches.
  7. Zero Trust Architecture: In a zero-trust model, no user or system is trusted by default, even if they are inside the corporate network. Implementing zero trust in critical systems ensures that every access request is verified and validated, reducing the risk of internal or external breaches.
  8. Logging and Monitoring: Critical systems must have comprehensive logging and monitoring mechanisms in place to detect suspicious activities in real time. Security testing should verify the effectiveness of these mechanisms in identifying and responding to threats quickly.
  9. Incident Response and Recovery Planning: Security testing for critical systems should also assess the system’s ability to respond to security incidents. This includes verifying incident response procedures and the robustness of disaster recovery and business continuity plans.

Challenges in Security Testing for Critical Systems:

  1. Complexity: Critical systems are often large, complex, and interconnected with other systems, making it challenging to conduct exhaustive security testing.
  2. Evolving Threats: The landscape of cybersecurity threats is constantly changing, and new attack methods are developed regularly. This requires continuous learning, adaptation, and testing.
  3. Resource Constraints: Comprehensive security testing can be resource-intensive. Many organizations may face budget or time constraints when trying to implement thorough security testing for critical systems.
  4. False Positives and Negatives: Security testing tools can sometimes produce false positives (indicating vulnerabilities where none exist) or false negatives (failing to detect actual vulnerabilities), requiring human intervention and expertise to interpret results correctly.

Conclusion:

Security testing for critical systems is a vital part of software testing. It ensures that software is resilient to cyber threats, protecting both sensitive data and the integrity of the system. Given the potential consequences of security failures, organizations must adopt a comprehensive and proactive approach to security testing, integrating it early into the development lifecycle, using the latest tools and techniques, and ensuring continuous monitoring. By doing so, they can minimize the risk of cyber-attacks, maintain the trust of their users, and meet regulatory compliance requirements, all while safeguarding the functionality and security of critical systems.

API Testing with C# and RestSharp

API testing is an essential part of the software development lifecycle, focusing on the communication and data exchange between different software systems. It verifies that APIs are functioning correctly and meeting performance, reliability, and security standards. Using C# with the RestSharp library simplifies the process of interacting with RESTful APIs by providing an easy-to-use interface for making HTTP requests.

AI-driven Test Case Generation

Introduction
In today’s fast-paced software development environment, manual test case generation struggles to keep up with the ever-increasing complexity of systems, especially in Agile and DevOps-driven projects. AI-driven test case generation has emerged as a powerful solution to streamline and automate this process, leveraging artificial intelligence and machine learning (ML) to improve test accuracy, efficiency, and coverage.

This lecture will explore AI-driven test case generation, how it works, its advantages and challenges, and its application in modern testing environments.


What is AI-Driven Test Case Generation?

AI-driven test case generation automates the creation and optimization of test cases using AI techniques such as machine learning (ML) and natural language processing (NLP). By analyzing historical data, code structure, requirements, and user behavior, AI tools can produce test cases that cover critical functionalities, saving time and effort for testing teams.

Instead of manually writing test cases based on predefined requirements, AI-driven approaches can dynamically generate tests that adapt to the code, highlighting the most important areas to test, and identifying risks that human testers might overlook.


How Does AI-Driven Test Case Generation Work?

  1. Data Analysis
    AI-based tools use data from multiple sources, such as:
    • Historical test data: Past test cases, bug reports, and test execution logs.
    • User interactions: Analyzing how users interact with the system to detect potential problem areas.
    • Source code: Static code analysis to detect patterns and complexities.
    This data helps train the AI models to generate relevant test cases by learning patterns of common defects, usage scenarios, and code areas that need focus.
  2. Natural Language Processing (NLP)
    NLP plays a significant role in understanding natural language specifications, like user stories or business requirements. By analyzing these documents, AI can automatically convert requirements into test cases that align with the intended behavior of the software.
  3. Model-Based Testing
    AI tools can also create models that represent the system’s behavior or user flow. Based on these models, they can generate comprehensive test cases covering all possible scenarios, edge cases, and user paths.
  4. Risk-Based Test Case Generation
    AI can prioritize test cases based on risk analysis, such as:
    • Code complexity.
    • Areas prone to defects.
    • Recently modified code.
    • Critical functionalities or components.
    This approach ensures that high-risk areas are tested more thoroughly, improving the likelihood of catching defects early.
  5. Self-Updating Test Cases
    One of the biggest advantages of AI-driven tools is the ability to maintain and update test cases automatically. As the software evolves, the AI tools can detect changes in the code and automatically adapt test cases, making it easier to keep up with rapid development cycles.

Advantages of AI-Driven Test Case Generation

  1. Speed and Efficiency
    AI tools can generate test cases much faster than manual efforts, making the process more efficient. This speed is particularly valuable in Agile and DevOps environments where rapid iteration is common.
  2. Better Coverage
    AI ensures broader and more comprehensive test coverage by analyzing patterns that humans might miss. This leads to more thorough testing, particularly in complex systems with multiple variables.
  3. Cost-Effectiveness
    Automated test generation reduces the need for extensive human intervention, significantly lowering costs associated with manual test writing and maintenance.
  4. Scalability
    AI can easily scale to accommodate large and complex projects, generating thousands of test cases quickly without needing additional resources.
  5. Adaptability
    As code changes, AI-driven tools can adapt the test cases accordingly, maintaining relevance even in dynamic development environments. This is particularly beneficial in continuous integration and continuous delivery (CI/CD) pipelines.

Challenges of AI-Driven Test Case Generation

  1. Data Dependency
    AI tools require large volumes of high-quality data to be effective. Poor or insufficient data may result in suboptimal test cases.
  2. Complex Setup
    The initial setup of AI-driven systems can be complex, requiring knowledge of AI/ML algorithms, testing frameworks, and training data. It may take time and effort before the system becomes fully functional.
  3. Tool Expertise
    Not all testing teams are familiar with AI-based tools, and additional training may be required to effectively implement and maintain these systems.
  4. Trust in AI
    Some teams may be reluctant to trust AI-generated test cases over manual ones. Ensuring that AI-driven tests align with business requirements and actual software behavior can require oversight.

Use Cases

  • Regression Testing: AI tools can quickly generate test cases for regression testing, ensuring that recent changes haven’t introduced new bugs.
  • User Experience Testing: By analyzing user behavior data, AI can create test cases to mimic real-world user scenarios, improving UX testing.
  • Security Testing: AI can identify potential vulnerabilities in the code and generate relevant test cases, helping teams catch security issues early.

Conclusion

AI-driven test case generation is transforming how software testing is performed. By leveraging AI’s ability to analyze data, adapt to changes, and optimize testing efforts, teams can increase test efficiency, improve coverage, and reduce the time and cost of testing. However, while AI offers many advantages, it requires proper setup, high-quality data, and a clear strategy to maximize its benefits.

Incorporating AI in test generation is becoming essential in today’s fast-evolving software landscape, especially in Agile and DevOps workflows.

Using Paste Special in Visual Studio to Generate C# Classes from JSON

Visual Studio offers a feature called “Paste Special” that allows you to easily generate C# classes from JSON objects. This is particularly useful when working with web APIs or any JSON data, as it automates the creation of data models that match the JSON structure.

  1. Copy the JSON Object:
    • Ensure you have your JSON object copied to the clipboard. For example
  1. Open Visual Studio:
    • Launch Visual Studio and open the project where you want to add the new classes.
  2. Add a New Class File:
    • In Solution Explorer, right-click on the folder where you want to add the new class.
    • Select Add > New Item….
    • Choose Class and give it a meaningful name, then click Add.
  3. Use Paste Special:
    • Open the newly created class file (e.g., MyClass.cs).
    • Delete any default code in the class file.
    • Go to Edit > Paste Special > Paste JSON as Classes.
  4. Review the Generated Code:
  5. Visual Studio will automatically generate C# classes that correspond to the JSON structure. For the example JSON, it would generate something like this:

How to input value into an international number text box in selenium

Below is the text box and the corresponding HTML:

If I used sendkeys, sometimes it may not working

driver.findElement(By.name(“mainphone”)).sendKeys(“(02)2222-2222”);
driver.findElement(By.id(“mobilephone”)).sendKeys(“05-5555-5555”);

If sendkeys() methods are not working then use following two ways to input text:

Before sendkeys() use click() method to click inside textfield i.e:

driver.findElement(By.name("mainphone")).click();
driver.findElement(By.name("mainphone")).sendKeys("(02)2222-2222");   
driver.findElement(By.id("mobilephone")).click();
driver.findElement(By.id("mobilephone")).sendKeys("05-5555-5555"); 

Open chrome mobile emulator with selenium c#

Hi guys, I am going to run a test mobile emulator with selenium and VS C#

Import

using System;
using System.Threading;
using NUnit.Framework;
using OpenQA.Selenium;
using OpenQA.Selenium.Support.UI;
using OpenQA.Selenium.Chrome;

Driver Utils Class

First of all delclaring the webdriver, which will be used for open specfic browser

namespace SeleniumAutomation
{
[TestClass]
public class Setup
  {
       IWebDriver webDriver;
  }
}

Open Chrome

[Test]
public void Open_Browser()
{
 webDriver = new ChromeDriver();

}

Open Chrome Mobile Emulator

 [Test]
 public void Mobile_Emulator_Browser()
 {
 ChromeOptions chromeCapabilities = new ChromeOptions();
 chromeCapabilities.EnableMobileEmulation("Pixel 5");
 webDriver = new ChromeDriver(chromeCapabilities);

 }

I think it will be helpful to run chrome in mobile emulator

Selenium C# How to Generate Extent Reports

Reports play a fundamental role when it comes to TESTING. Tester can now know the real-time reports of test suit execution. Reports made ease to know the ratio of Pass? Or Fail? Post-test suit execution and it is the only documentation to know about test execution results.

Everyone wish to see the detailed description of the test results. Don’t you? here is the solution for it. And, let us see how these reports can be achieved? in Selenium C# – NUnit framework automation testing.

To achieve detailed test execution results as HTML reports we need to rely on third party tool called => Extent Reports. These reports provide decent narration of test execution results and are depicted in PIE chart.

How to Reference Extent Reports in MS Visual Studio

Extent Reports can be directly referenced via NuGet Gallery:

Step 1) Project> Manage NuGet Packages

Step 2) In the next window

  1. Search for ExtentReports
  2. Select the search result
  3. Click Install

Step 3) Install selenium support from NuGet package

Step 3) Click ‘I Accept’

Step 4) Create a new C# class with the below code for Extent Reports.

using System;
using System.Collections.Generic;
using System.Linq;
using System.Text;
using System.Threading.Tasks;

using OpenQA.Selenium;
using OpenQA.Selenium.Support.UI;
using OpenQA.Selenium.Chrome;

using NUnit.Framework;
using NUnit.Framework.Interfaces;
using NUnit;

using AventStack.ExtentReports.Reporter;
using AventStack.ExtentReports;
using System.IO;

namespace RnD
{
    [TestFixture]
    public class TestDemo1
    {
        public IWebDriver driver;

        public static ExtentTest test;
        public static ExtentReports extent;

        [SetUp]
        public void Initialize()
        {
            driver = new ChromeDriver();
        }


        [OneTimeSetUp]
        public void ExtentStart()
        {
            
            extent = new ExtentReports();
            var htmlreporter = new ExtentHtmlReporter(@"D:\ReportResults\Report" + DateTime.Now.ToString("_MMddyyyy_hhmmtt") + ".html");
            extent.AttachReporter(htmlreporter);

        }


        [Test]
        public void BrowserTest()
        {
            test = null;
            test = extent.CreateTest("T001").Info("Login Test");

            driver.Manage().Window.Maximize();
            driver.Navigate().GoToUrl("http://testing-ground.scraping.pro/login");
            test.Log(Status.Info, "Go to URL");

            //provide username
            driver.FindElement(By.Id("usr")).SendKeys("admin");
            //provide password
            driver.FindElement(By.Id("pwd")).SendKeys("12345");

            try
            {
                WebDriverWait wait = new WebDriverWait(driver, TimeSpan.FromSeconds(1));
                wait.Until(ExpectedConditions.ElementIsVisible(By.XPath("//h3[contains(.,'WELCOME :)')]")));
                //Test Result
                test.Log(Status.Pass, "Test Pass");

            }

            catch (Exception e)

            {
                test.Log(Status.Fail, "Test Fail");
                throw;

            }
        }

        [TearDown]
        public void closeBrowser()
        {
            driver.Close();
        }

        [OneTimeTearDown]
        public void ExtentClose()
        {
            extent.Flush();
        }
    }
}

Post running test method, the test execution report looks as shown below:

how to setup selenium webdriver with c#

Set Up Visual Studio with Selenium WebDriver:

Create a new project in Visual Studio:

Step 1) In the File Menu, Click New > Project

Step 2) In the next screen

  1. Select the option ‘Visual C#’
  2. Click on Console App (.Net Framework)
  3. Enter name as “RnD”
  4. Click OK

Step 3) The below screen will be displayed once the project is successfully created.

Set up Visual Studio with Selenium WebDriver:

Step 1) Navigate to Project-> Manage NuGet Packages

Step 2) In the next screen

  1. Search for Selenium on the resultant screen
  2. Select the first search result
  3. Click on ‘Install’

Step 3) The below message will be displayed once the package is successfully installed

Steps to install NUnit Framework:

Step 1) Navigate to Project-> Manage NuGet Packages

Step 2) In the next window

  1. Search for NUnit
  2. Select the search result
  3. Click Install

Step 3) The below message will appear once the installation is complete.

Steps to download NUnit Test Adapter

Please note that the below steps work only for 32-bit machines. For 64-bit machines, you need to download the ‘NUnit3 Test Adapter’ by following the same process as mentioned below.

Step 1) Navigate to Project-> Manage NuGet Packages

Step 2) In the next window

  1. Search NUnitTestAdapter
  2. Click Search Result
  3. Click Install

Step 3) Once install is done you will see the following message

Steps to download Chrome Driver

Step 1) Navigate to Project-> Manage NuGet Packages

Step 2) In the next window

  1. Search for Chromdriver
  2. Select the search result
  3. Click Install

Step 3) System may asked for permission. Click on ‘Yes to All’

Step 4) The below message will appear once the installation is complete.

Selenium and NUnit framework:

Selenium with NUnit framework allows differentiating between various test classes. NUnit also allows using annotations such as SetUp, Test, and TearDown to perform actions before and after running the test.

NUnit framework can be integrated with Selenium by creating a NUnit test class and running the test class using NUnit framework.

The below are the steps needed to create and run a test class using NUnit framework.

Steps to create a NUnit Test class in Selenium:

Step 1) In the Solution Explorer, Right clicked on project > Add > Class

Step 2) Class creation window will appear

  1. Provide a name to the class
  2. Click on Add button

Step 3) The below screen will appear.

Step 4) Add the following code to the created class. Please note that you need to specify the location of ‘chromdriver.exe’ file during chrome driver initialization.

using System;
using System.Collections.Generic;
using System.Linq;
using System.Text;
using System.Threading.Tasks;

using OpenQA.Selenium;
using OpenQA.Selenium.Support.UI;
using OpenQA.Selenium.Chrome;


using NUnit.Framework;
using NUnit.Framework.Interfaces;
using NUnit;

namespace RnD
{
    [TestFixture]
    public class TestDemo1
    {
        public IWebDriver driver;

        [SetUp]
        public void Initialize()
        {
            driver = new ChromeDriver();
        }

        [Test]
        public void BrowserTest()
        {
            driver.Manage().Window.Maximize();
            driver.Navigate().GoToUrl("https://www.google.com/");
        }

        [TearDown]
        public void closeBrowser()
        {
            driver.Close();
        }
    }
}

Step 4) Click on ‘Build’ -> ‘Build Solution’ or keypress ‘Ctrl + Shift + B’

Step 5) Once the build is successful, we need to open the Test Explorer window. Click on Test -> Windows -> Test Explorer

Step 6) Test Explorer window opens with the list of available tests. Right-click on Test Explorer and select Run Selected Tests

Step 7) Selenium must open the browser with specified URL and close the browser. Test case status will be changed to ‘Pass’ on the Test Explorer window.

Database Testing Checklist

Database Testing

  • Synchronization between the database and the values displayed in our client/web.
  • Query results, views, stored procedures, indexers Etc.
  • Data manipulation (Update, Delete, insert Etc.).
  • Database performance.
  • Data maintenance.
  • Table’s structure.
  • Data recovery.
  • Data integrity.
  • Others

Clean database testing

  • Verify clean database testing.
  • Input 1st data

Database system-level tests

  • Validate the DB behavior of any case of service failures (recovery, error handling Etc.).
  • Validate that all indexes are created when it can increase the system performance.
  • Validate that appropriate events are created ad sent to the EventVwr/trace log.
  • Validate that DB tables are created with informative and reasonable names.
  • Try to work when the storage is ‘0’ and the e database is in running state.
  • Perform your tests on different versions (SQL 2005, 2008, 2012 etc.).
  • Validate the software security model (User roles, permissions etc.).
  • Validate the connection strings against SQL/Win authentications.
  • Validate data migrations (Different Database, Cluster, etc.).
  • Validate the behavior of the system against SQL injections.
  • Validate date to DB when the server is loaded.
  • Try to work when the database server is down.
  • Try to work with difference instance.
  • Validate restore and backup plans.

Database Integration Testing

  • Check that all columns are set with the relevant data type (Bigint, int, string Etc.)
  • Check that all data is logically organized in the relevant DB tables.
  • Check that each data item is located under the relevant column.
  • Is there any irrelevant data in the software dedicated tables?
  • Check that each table contains the relevant data.
  • Try to insert invalid database values.
  • Verify the data encryption (if any).

Data field tests

  • Validate that “Allow Null” condition is not allowed in a place that result a software failure.
  • Validate that all tables are created with logical structure (Primary, foreign keys.)
  • Validate that “Allow Null” condition is set when you need to allow it.
  • Validate that mandatory fields are created, this issue is very important when you work with multiple tables that depends on each other.

Procedure tests

  • Validate that the data the affected by the procedure is changed as expected.
  • Validate that all procedures are triggered when they supposed to run.
  • Validate that all the conditions receive an appropriate date inputs.
  • Validate that all procedures are created with the relevant code.
  • Is there an appropriate error handling for a failed procedure?
  • Validate that all the loops receive an appropriate date inputs.
  • Validate the procedure’s parameters (types, names, etc.).
  • Test the SP while executing the code manually.
  • Validate important code with SQL profiler.
  • Validate that all procedures names
  • Run tests with missing parameters.

Database and software integration (Client, web Etc.)

  • Validate that the user data is saved when the user “Apply” or “Submit” the changes.
  • Try to insert “NULL” values on fields that doesn’t supposed to receive it.
  • Validate that the user receives the current result when pulling data.
  • Validate that transaction the data type boundaries (Minima Etc.)
  • Validate that empty spaces are not committed to the database.
  • Validate that the values displayed based on the database data.
  • Try to insert UNICODE on Unicode character strings.
  • Try to insert values that exceed the field boundaries.
  • Validate that transactions the negative data values.
  • Insert invalid date format on Date and time fields.
  • Validate that the data integrity is not affected when the “Apply” or “Submit transactions are failing during the process.
  • Validate that the “Roll Back” option is available when the DB transaction is failed in the middle.

Data checking

  • Create Data from frontend and check by Query
  • Delete Data from frontend and check by Query